
There are a lot of recurring activities in woodworking. Many projects will require you to cut some type of joint, like mortise and tenon or dovetail. You need a lot of other skills when building or renovating a piece of furniture. Another trick that you might want to add up your sleeve is how to cut a hole in wood without going all the way through. Many projects require it to hide certain details (screw heads or hinges, for example) to give your project a cleaner and nicer look.
There are a few methods to achieve this. The easiest way to cut a shallow hole is by using a router. This woodworking tool is specifically designed to hollow out material. Another alternative would be using a drill press equipped with a Forstner bit. You can also use a power drill if you are careful enough. A more industrious way would be using a hole saw to cut at the desired depth, then chiseling out the unwanted material. If you don’t need to have a flat surface at the bottom of the hole, a countersink bit is enough.
If you need a small hole, there are another bunch of alternatives you can choose from. For example, you can place a piece of scrap wood on top of your working piece as a depth stop. You could also use some duct tape to mark the desired depth on the bit or use a drill stop.
This was just a quick intro to some of the available techniques. Let’s talk about each one more specifically.
How to Cut a Hole in Wood Without Going All the Way Through
There are several ways to do this. In this paragraph, we will focus on large cuts. If you need to cut a small hole (for example to hide a screw head), you can jump to the next section. First, let’s talk about Forstner bits.
Forstner Bit

These bits are designed to cut clean, flat-bottomed holes. You can cut at different angles; you can also make overlapping cuts (i.e. cuts that hang off the edge of your workpiece). Forstner bits come in different dimensions. The most common set goes from 1/4 to 2 inches in size. Bigger bits can be found, too. Their key feature is the guide rim, which is the bit portion that cuts the wood fibers alongside the border of the hole. It prevents the bit from skipping/shifting to the side while cutting. There are three main guide rim types:
- Sawtooth rims: these rims are equipped with saw-like teeth that cut around the perimeter, while the main cutter across the rim cleans up the hole. These rims allow faster cuts since there’s less friction, thus less heat generated. On the downside, sawtooth rims are less effective in guiding the bit into the cut. They tend to make you shift to the side. They also tend to rip the material, which makes them bad at angled and overlapping cuts.
- Continuos rims: these rims come with a knife-like edge. The whole rim is engaged with the material here, so they make for cleaner cuts. They are easier to handle since they guide you more into the wood. The downside is that they tend to build more heat, so you have to go slower to prevent overheating. They also tend to go dull very fast, so you need to apply the right amount of pressure.
- Wavy rims: these rims are a compromise between the previous ones. The material is ejected easier than with continuous rims, thus keeping them cooler. The cleanliness is acceptable, too.
So which one should you get? The best choice would be bits with wavy rims. You’ll get clean cuts without having to worry too much about heat. However, in my experience, they are hard to find in local stores. They are also quite expensive. What to do then? You need to consider that all rims perform well when new. On top of that, you usually don’t have to make a lot of shallow cuts. Bottom line, you’ll be fine with sawtooth rims for most projects if you are not a professional.
Some more things to consider about Forstner bits:
- You are supposed to use Forstner bits with a drill press, in order to drive the bit straight down into the wood. If you use a drill, you will find yourself shifting all over the place, having a hard time centering. A possible workaround to this would be drilling a hole in some spare piece of wood, then clamping it together with the one you want to drill in. It will work as a guide when drilling.
- Forstner bits come with a little pilot at the center that will leave a small pilot hole. If you don’t want that “centering spur” on your piece, you’ll have to chisel that away.
- A lot of strength is needed since they require a lot of pressure (especially on hardwood for obvious reasons). That’s because the amount of material they remove is wide.
- Forstner bits tend to get hot rather quickly. You will have to slow down a lot of times to let it cool down. On top of that, you’ll need to stop frequently to clean up. All things considered, getting the job down can be a chore. Keep that in mind.
Router
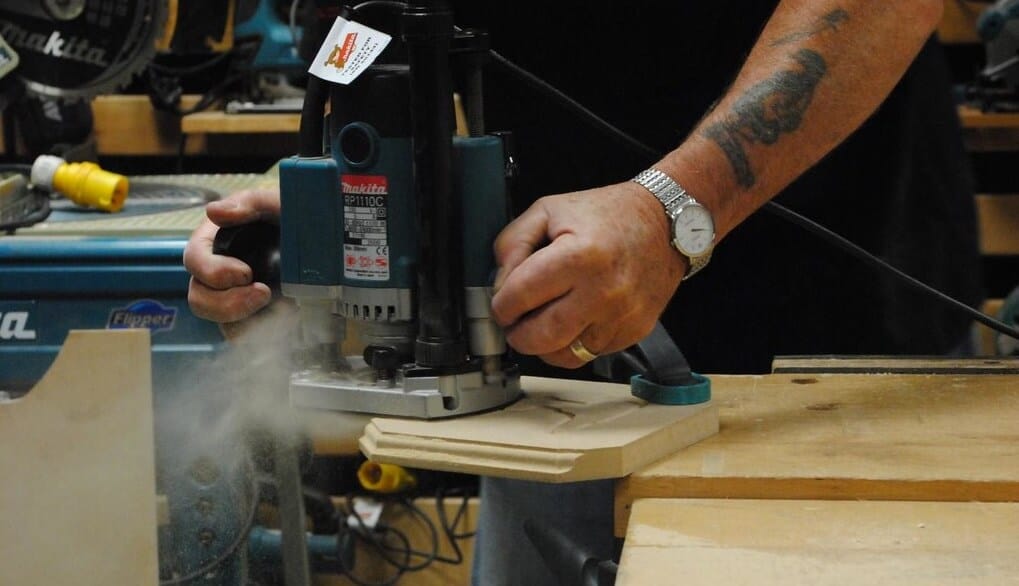
Previously we learned that Forstner bits leave a visible centering spur. You can clean that away with a chisel, but it might be difficult to obtain a perfectly flat bottomed cut. You can achieve that with much less effort by using a router.
We need to distinguish between plunge and fixed base routers. For this kind of job, plunge routers are ideal. With this type of router, you can cut directly in the middle of the material, since you can lower the bit while the router base is already positioned. Set the required depth and plunge in with a straight bit. If can’t find a bit that is big enough, you’ll have to use the appropriate guide jig.
What about fixed routers? With the bit already lowered under the base, you’ll have to use a workaround to cut in the middle of your project. For example, you could tilt the tool at the start to initiate the cut inside your piece.
Hole Saw and Chisel

Let’s say you don’t have a router available, and you don’t want to spend money on Forstner bits. You may consider going the hole saw and chisel route, which is less expensive. Hole saws are generally used to cut large holes. The most common sizes go from 1/4 to 6 inches. Usually, hole saws are used to cut all the way through the wood. The only limit is the length of the cutting cylinder.
If you are careful enough, you can also use hole saws to cut shallow holes. Just mark the depth you wanna reach on the cylinder and stop once you get there. Then pull out the bit and chisel the excess wood away. However, this method has two downsides:
- It might be hard to get the bit out because you are not cutting all the way through;
- Cutting the wood with a chisel could be quite laborious. On top of that, it might be difficult to obtain a clean, flat bottom by chiseling.
Keep these things in mind before going this route.
Countersink Bit

Maybe you just want to hide a screw head under the surface level to make your project look cleaner. If that’s the case, you need a countersink bit to make a countersunk hole, i.e. a cone-shaped housing plus a pilot hole. That way, you’ll kill two birds with one stone. You’ll give a more professional look to your project with the countersunk hole. Also, you’ll prevent tear out and wood splitting with the pilot hole.
To do this, you have two alternatives, fluted bits or combination bits. Fluted bits create only the countersunk portion of the hole. Thus, you’ll need to preemptively cut the pilot hole with a common drill bit. Apply a piece of tape on the bit to mark the desired depth. You’ll drill until the tape reaches the surface level. With combination bits, you can create both at the same time. Combination bits are the best choice if you need to drill a series of holes and you need them to be all the same depth. These bits guarantee good repeatability.
Finally, a suggestion. When cutting a countersunk hole, the most important thing is driving the bit into the wood very slowly. That’s the only way to get a clean conical hole while avoiding any unwanted damage like splitting and tear out.
How to cut a small hole that doesn’t go all the way through?
If you want to cut a small shallow hole, you don’t need any fancy equipment. There are a few cheap ways to do it.
- Wrap your bit with some tape so that you leave uncovered the part which is necessary to reach the desired depth. You want to use the tape to create what will look like a flag, which will sweep away the sawdust when depth is reached. The only downside of this method is the risk of tape slipping. It may happen if the drill bit is dirty, or when enough heat has built up. Yet, it’s a good way to drill a couple of holes with approximate depth.
- Place a piece of scrap wood on the piece you want to cut, then drive the bit until the chuck touches it. Obviously, the cut depth will depend on the scrap wood thickness. You might have to adapt the cut’s depth to the scrap wood you have available.
- Another option is using a drill stop. It is easy to set up and provides great repeatability to your cuts. Moreover, it is often included when buying a drill, so you probably don’t even have to spend extra money on it. The only recommendation I have to give you is to place a piece of plywood on top of your working piece to avoid marring the surface. If you wanna get a drill stop, get this one. It’s pretty cheap and it works with 1/16 to 1/2 inches diameter bits. It’s made in plastic, so there’s less risk of ruining your working piece. It’s very hard plastic, so it will last you for a long time.
Finally, if you want to hide those screw holes view, get yourself some button plugs. You can install them with some wood glue and they will give your project a more pleasant look. If you want to completely hide the fasteners, get some flat-headed plugs. That way, you’ll get a nice flush finish.
Final Thoughts
As you can see, there are a few ways to cut a hole that doesn’t go all the way through the wood. There might be even more ways to get the job done, that’s for sure! I choose these specific methods because they require different tools, so there’s a higher chance that you already own one. On top of that, I covered methods for different kinds of holes to be as exhaustive as possible. In short, to recap:
- For large, flat bottomed cuts you can either use a Forstner bit (wavy rims are the best) or a router. If you need a clean bottom, use a hole saw and a chisel.
- If you don’t need a flat bottomed cut, but you just want to hide a fastener, a countersink bit is a reasonable choice.
- For small holes, there are a variety of choices: you could use some tape, a drill stop, some scrap wood as a depth gauge. The only limit here is your creativity.
I hope you learned something useful by reading this article! Let me know if you are aware of other techniques to execute this task in the comments below!


