Let’s say you are doing a home remodeling project. You likely have to cut some tiles, maybe to adapt them to a certain angle. If you need to put some fixtures in the wall, where preexistent tiles are already installed, you need something that can perform a small, shaped cut. If you were to buy a specific tool for that, like a wet saw, then you would have to spend a good amount of money. I generally don’t like to buy tools for specific jobs, I always try to adapt what I already have to avoid getting even more power tools than what I already have.
If you happen to own a Dremel, then the problem is easily fixed. They are the ideal tools for this kind of job. In this article, I’ll show you how to cut tiles using a Dremel rotary tool. Here’s a quick summary of the steps you need to take to do it:
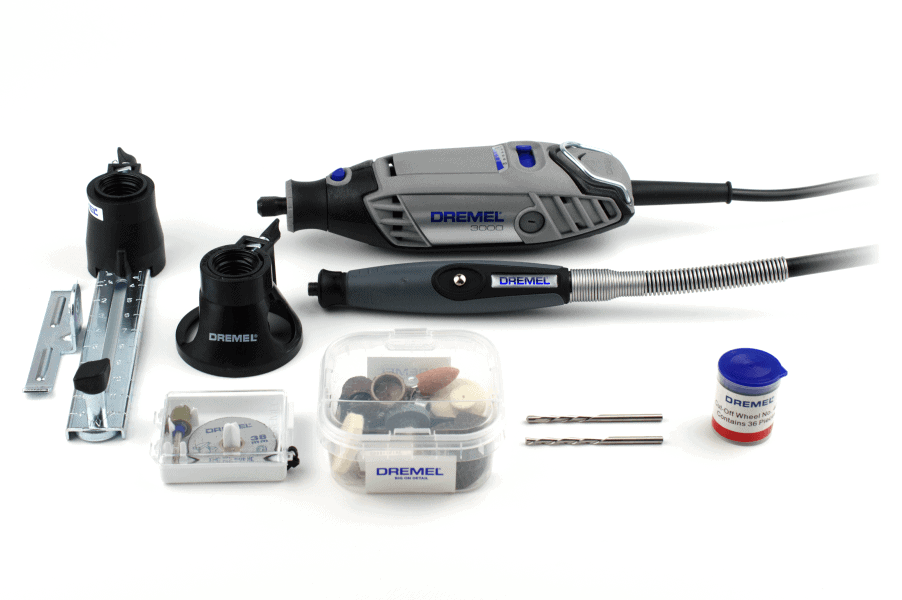
- First, you need to choose the right cutting accessory. For straight cuts, use the EZ545 Diamond Wheel. For shaped cuts, use the 562 Cutting Bit. Get the 566 Wall Tile Cutting Kit that also includes a useful guide for more controlled cuts.
- Take all the safety measures needed. Make sure you are prepared to deal with a lot of dust. Mark the line where you want to cut. Clamp loose tiles before cutting;
- Get down to the cutting. Use appropriate pressure and speed. Let the bit cool down when needed.
Now, let’s detail each one of them in the following paragraph.
How to Cut Tile With a Dremel – Follow This Steps
1) Choosing the Right Attachment
As always when using a Dremel, one of the most important things to do for getting the best results is choosing the right accessory for the application at hand. This might be quite difficult at times since there are so many different attachments available. In our scenario, there are two things you need to consider to choose correctly: type of cut and tile rating. For your application, you could either need a straight cut or a shaped cut, for example, a circle for a pipe.
Then you need to consider tile rating. This is also referred to as PEI rating since it’s based on testing done by the Porcelain Enamel Institute. It’s basically a measure of the durability of the tile. Ratings range from zero to 5. The higher the rating, the higher the tile’s resistance to abrasion. For the sake of this article, we’ll consider 3 ratings: 1,2, and 3.
Based on these factors, you’ll have to choose between the following cutting bits:
- EZ545 1-1/2-Inch Diamond Wheel. This cut-off wheel has a diameter of 1-1/2 inches (38.1 mm). There’s also a smaller version, the 545, which has a diameter of 7/8 inches (22.1 mm). This wheel is ideal for straight cuts on hard materials: not only tiles but also marble, bricks, and concrete. The diamond coat makes it quite resistant to wear. Ideally, you’d want to use this wheel on tiles rated 1 or 2. It’s the best cutting attachment to get a clean cut on loose tiles.
-
Dremel 562 Tile Cutting Bit. This cutting bit comes with a 1/8″ diameter and can cut up to 20mm deep. It’s ideal for cutting wall tiles around house fixtures for remodeling projects. For the best results, get yourself the DREMEL 566 Wall Tile Cutting Kit.
This includes a 562 bit and a guide attachment. It will be way easier to perform a controlled cut with this. Plus, you can adjust the cutting depth, up to 3/4″. This is very useful when working on tiles fixed on walls since it will prevent you from damaging the underlying surface.

2) Prepare the Area for the Cutting Phase
Before we get to the cutting, we need to make sure we operate safely. Moreover, the following steps will also allow you to get the best results possible:
- Take all the needed safety precautions. Cutting tiles will make a lot of fine dust, so you absolutely need to wear glasses and a face mask. If you are working in a small room, such as a bathroom, consider opening any window that communicates with the outside of the house. Don’t leave doors open, or the dust will spread around the house. In addition to that, remember to wear ear protection (Dremels get very loud when operating) and gloves. Make sure to always keep both hands on the tool to avoid kickbacks.
- Talking about dust, you also want to cover up any furniture in the working area to keep it from getting dusty. You’ll thank me later when you won’t have to clean them.
- Next, you need to mark where you want to cut the tile. If you need to cut a circle, use something of that shape as a guide to avoid making ugly cuts. Use a permanent marker on smooth tiles.
- If you are cutting a fixed tile, that’s pretty much it. On the other hand, if you are working on loose tiles, there’s an additional step to take. For the best results, you want to clamp your tile so that it stands still when cutting. Use a couple of clamps to secure it to your workbench. Don’t apply too much force to avoid cracking it. If you have metal clamps, put a piece of cloth between the tile and the clamps to avoid scratching it.
3) Cutting
After taking all the necessary preliminary steps, it’s finally time to get to the cutting!
If you are using the 545 cutting wheel to cut in the middle of a loose tile or on fixed tiles, you don’t want to start at the beginning of the cutting line, since it will make you cut more material than you need. Instead, start somewhere in the middle of the desired cut line. Slowly plunge the wheel until you reach the desired depth, then move in both directions.
The same thing goes with the 562 bit. Start by plunging it onto the tile, then move along the line you marked. Make sure you don’t apply too much pressure, to avoid cracking the tile. Let the tool do the job for you. The only downside of this bit is that it heats up fast. If you don’t stop when it does that, it will get dull very quickly. You will feel more resistance when it starts to heat up; that’s the sign you need to stop for a bit to let it cool down.
Finally, here there are some more tips when cutting tiles with Dremels:
- When using a cut-off wheel, always work against the rotating direction. If you do the opposite, the tool will try to “run off”, making it very difficult to control.
- Consider using a Right Angle Attachment like the Dremel 575 or a Flex Shaft Attachment for narrow spots.
The flex shaft is also nice to have when working overhead for longer periods.
- We talked about the pressure to apply, but what about the speed? The RPM to use differs based on the attachments. Dremel suggests staying between 12.000 and 24.000 RPM with the 545 cutting wheel, while a 25.000-30.000 RPM range is advised with the 562 cutting bit.
- You’ll probably need multiple passes to cut thick tiles with a cutting wheel. Use the first pass as a further guideline.

4) Final Touches
If you decide to use the 562 bit, the ending cut will likely result quite rough. If you’ll cover it up with some fixtures, that’s no problem. In case the cut will remain exposed for some reason, there are two things you can do:
- Use a smaller bit. It will take longer, but the cut will also end up much cleaner;
- You can perform a little bit of sanding/grinding. You could try using a grinding stone, such as the 83142 Grinding Stone. It’s a silicon carbide stone, which is ideal for non-ferrous materials such as ceramic and glass. Don’t press too much on the edge of the tile, to avoid cracking it. If you don’t need to remove too much material, simply use some sandpaper to smooth the edges by hand.
How to Cut Marble With a Dremel?
The steps to take when cutting marble tiles with a Dremel are pretty much the same as with other types of tiles. In short, you firstly need to get an appropriate attachment, such as the EZ545 Diamond Wheel for straight cuts and the 562 Tile Cutting Bit for shaped cuts. Then, you need to prepare the tile for cutting by clamping it if it’s loose, and by drawing the cutting line on it. Then you can get to the cutting; just make sure to wear safety gear (face mask and glasses are the most important).
The only downside of using a Dremel on marble is that it can be a quite time-consuming task. Marble is a very tough material; you need to go at it with quite the amount of pressure and speed to get some kind of result. With Dremels, there’s only so much you can do. You can’t press very hard on it, or you’ll end up with a dull bit or a broken wheel very quickly.
That’s why I’d use Dremel on marble only for very small jobs. For extensive cuts, it’s better to look somewhere else, tool-wise.
How to Cut Concrete With a Dremel?
Cutting concrete with a Dremel involves following the same steps I outlined before. You should use the same suggested attachments: EZ545 cutting wheel for straight cuts, 562 bit for shaped cuts. Considering the amount of dust you will produce, it’s key to wear a face mask and some glasses to protect yourself from it.
Cutting concrete with the 545 will require several passes. Use the first shallow cut as a guideline. If you decide to use the 562 bit to cut in the middle on some concrete, use a concrete drill bit to initiate the job. After that, you can use the Dremel bit to move along the desired line.
After you finished cutting, consider using a grinding attachment to smooth the visible edges.
Beware though. Using a Dremel on concrete will require much more time than what you’ll need with more powerful tools. Use it only for small jobs, or if you need to work in a narrow spot where you can’t fit a bigger tool. Otherwise, it’s better to use bigger tools for this kind of stuff, such as angle grinders equipped with the appropriate disc.
Final Thoughts
So there you have it, some quick guidelines that should help you get started if you need to cut tiles with a Dremel. For small jobs, Dremels are truly a godsend to me. On many occasions, common tools like drills and angle grinders are just too big for the application or the spot you need to work into. Furthermore, with the variety of attachments available, you can be sure that there’s one that is right for your project. In our case, you could either choose a diamond-coated wheel for straight cuts, or a cutting bit specifically designed for tiles.
After choosing the right accessory, the process is quite straightforward. The only thing you need to remember is to frequently check if the bit is getting too hot. If that’s the case, be patient and let it cool down. This will also keep it from getting dull, so you’ll even be quicker by working this way.
That’s it for this article. Let me know in the comments below what you’ll be using your Dremel for!


